
I’ve spent more hours on Mirage than any other map in CS2. And for most of those hours, I was throwing smokes blind — hoping they’d land where I wanted, praying I wasn’t smoking off my own team.
After finally sitting down and learning proper lineups from a comprehensive Chinese utility guide, I can tell you: utility isn’t about knowing every single lineup in the book. It’s about having 2-3 reliable ones per spawn position that you can execute under pressure.
This guide covers the full utility package — CT defense and T-side executes — organized by position. Every lineup here is one I’ve tested in game.
Table of Contents
CT Side Defense
A Site — Anti-Rush & Retake
The Anti-Rush Molotov (A1)
This is my go-to fire for stopping early A1 pushes. It lands deep enough that CT players who know the map can’t just step over it and fight you.
Position: Stand in front of the first chimney at A site.
Aim: Line up the first chimney → second chimney → third chimney. Once aligned, start running forward and throw.
Why this works: Most players throw a shallow fire that experienced Ts can step over. This one lands deep enough that anyone pushing through eats full damage. They either wait it out or die — giving you time to reposition.
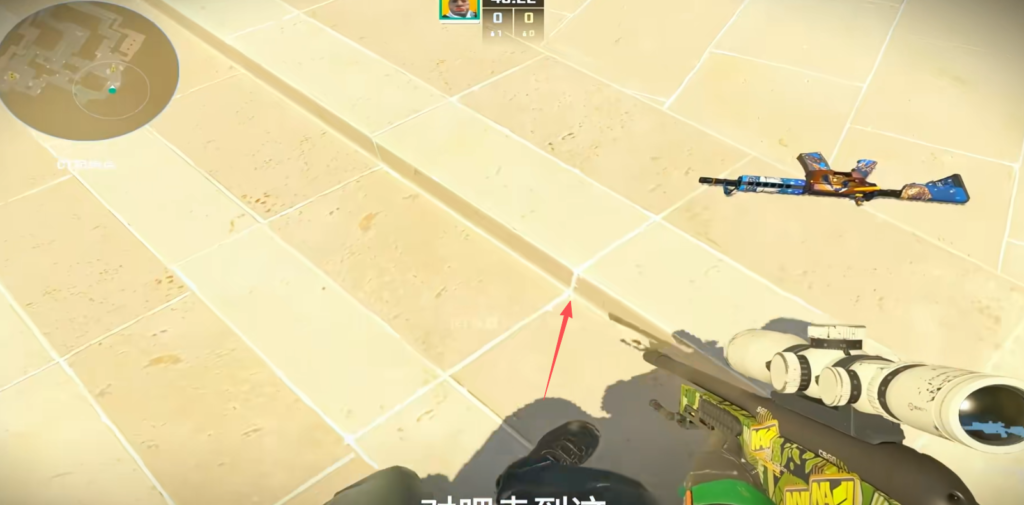
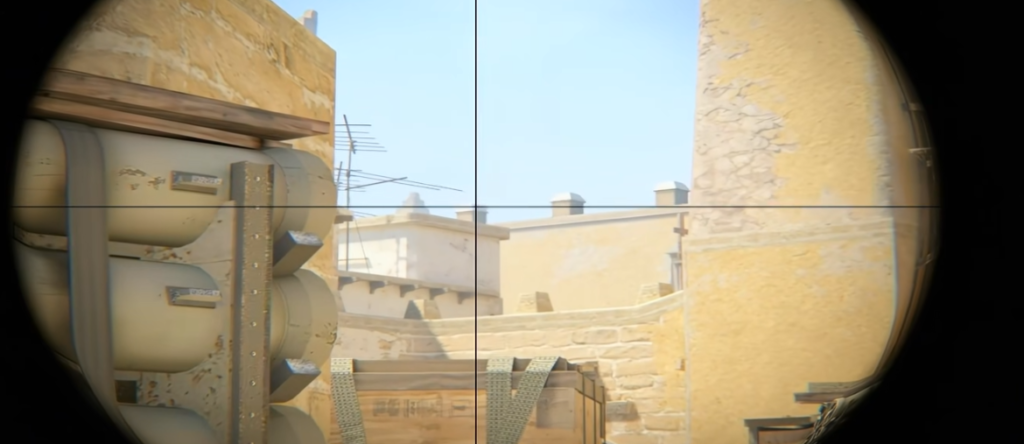
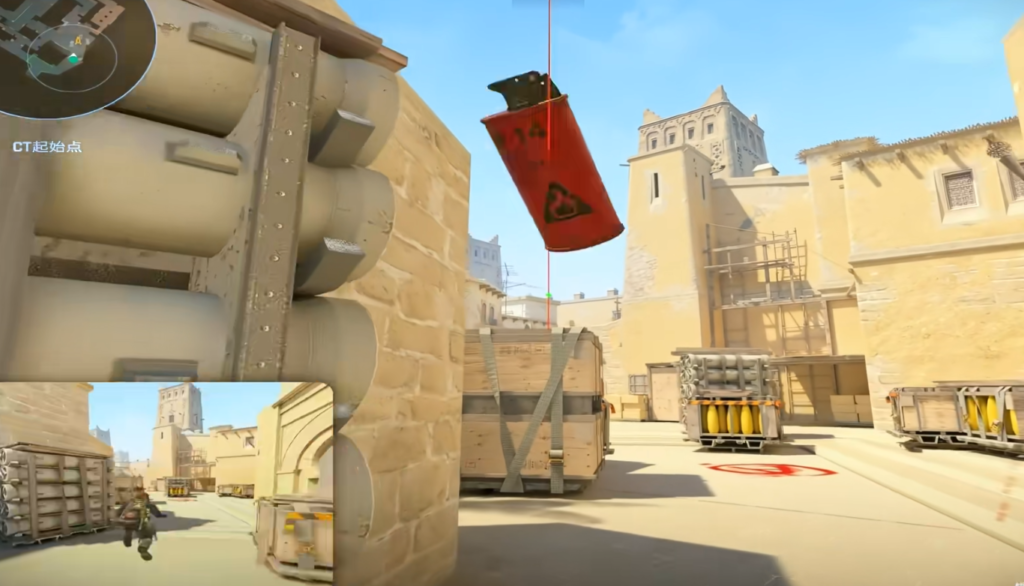
[A1 Anti-Rush Molotov — Stand in front of the chimneys at A site.]
Follow-Up Grenade Options
Option 1 — If you don’t know the enemy’s habits:
- Throw: High arc, take one step forward before releasing.
- Effect: Lands at the exit of A1, punishing anyone who pushes through the fire.
Option 2 — If they’re respecting the fire (not pushing):
- Throw: Run forward and throw normally.
- Effect: Lands near the A1 corner where they’re waiting. Since A1 is mostly a non-prefire angle, anyone holding there eats full damage.
My tip: Start with Option 1. If nobody’s taking damage from the fire, switch to Option 2 next round. Mix it up.
A2 Utility
A2 Smoke (Standard): Straightforward lineup — aim at the gap between the tree and the rock from A2, jump-throw. Your VIP teammate handles a second smoke.
Under A2 — Mid Retake Flash:
- Hug the wall, aim at the arch entrance, walk one step silently and flash.
- Effect: Whites out everyone in mid. VIP teammate must wait for the pop to peek; arch and B小 can peek freely.
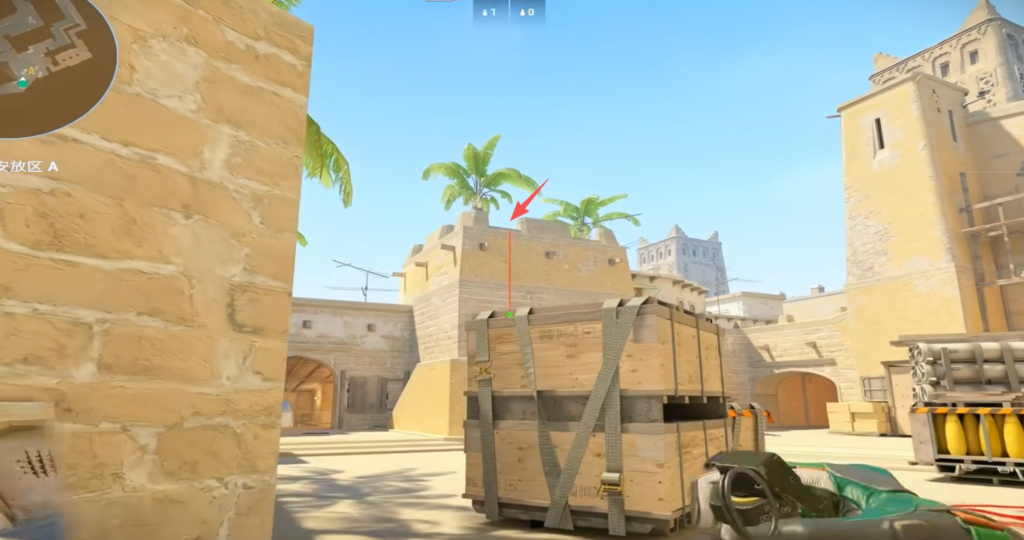
[:Under A2 Mid Retake Flash ]
Under A2 — Retake Flash into A1 (2 versions):
Version 1 (Wall-bounce): Hug the corner, aim at the wooden beam above, jump-throw. Bounces off the wall and whites A1. Downside: higher-ranked players hear the bounce and turn away.
Version 2 (Silent — my favorite): Hug the ladder (don’t climb), aim at the wooden beam, double-click throw. No wall-bounce sound. Still whites A1 fully. Much harder to dodge.
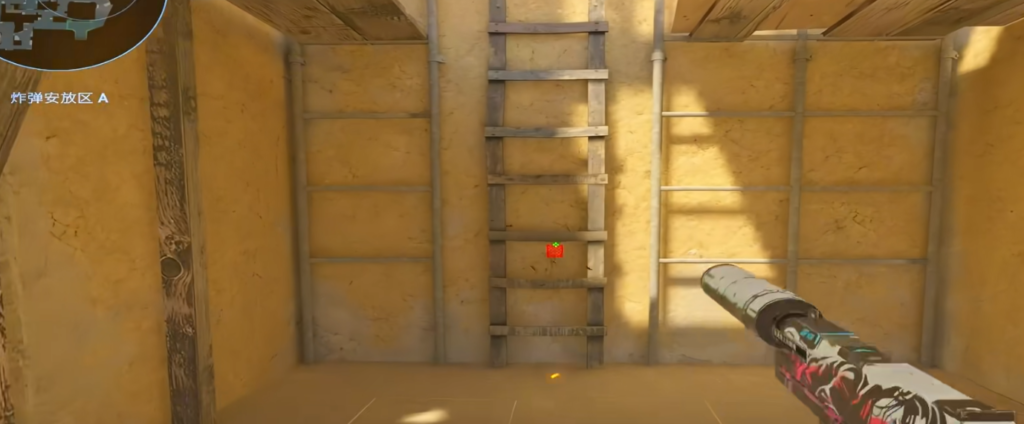
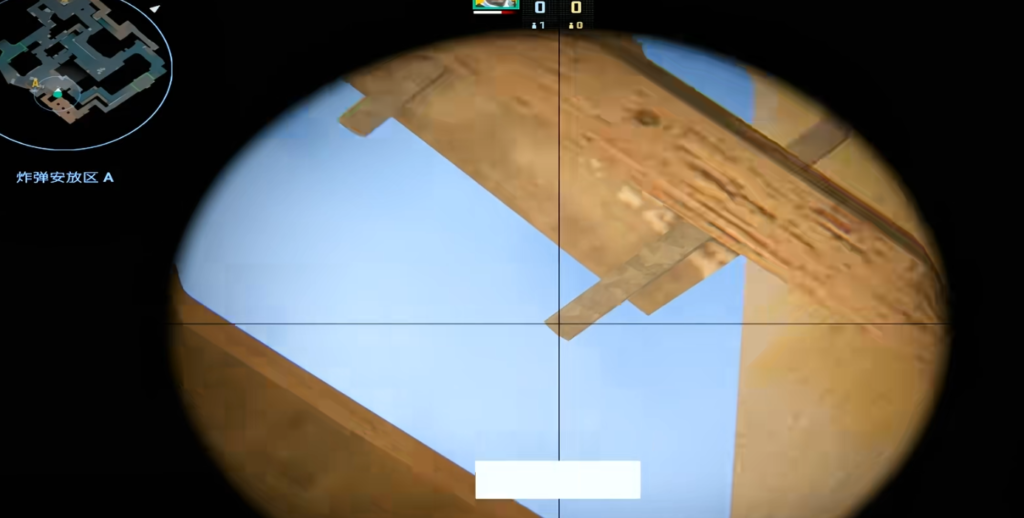
[Silent A1 Flash from Ladder ]
Arch Smoke (from CT)
When pushing out of arch and the enemy has thrown a fire at your exit: Stand at the usual arch position, aim at the upper half of the wall, take one step forward and throw. This smoke blocks underpass exit and mid exit — only B小 remains as a threat angle.
Retake Flash from CT (Aggressive Repeek)
In a 2v2 situation where you’re holding A and spot enemies at A1/arch: Stand near the dumpster, aim at the diagonal line (upper half), left-click throw. Whites A1, arch, and anyone pushing toward site.
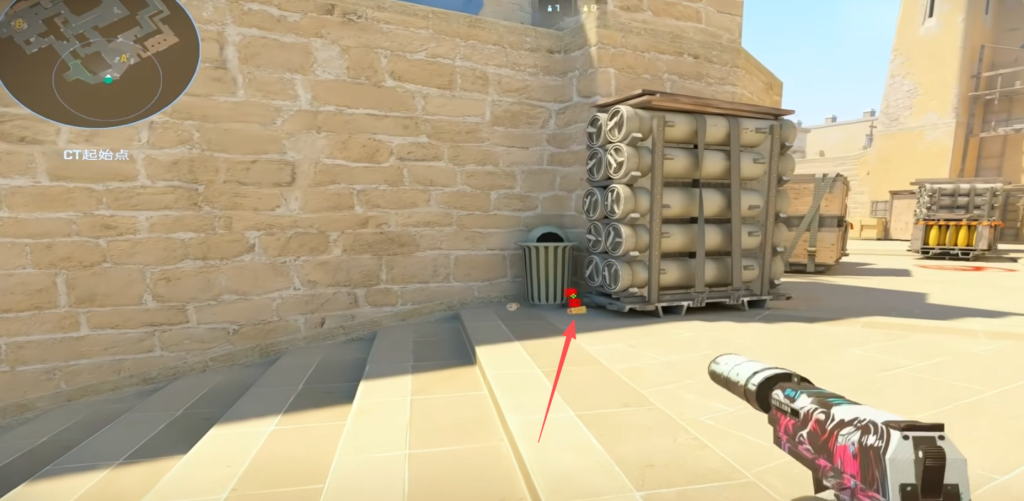
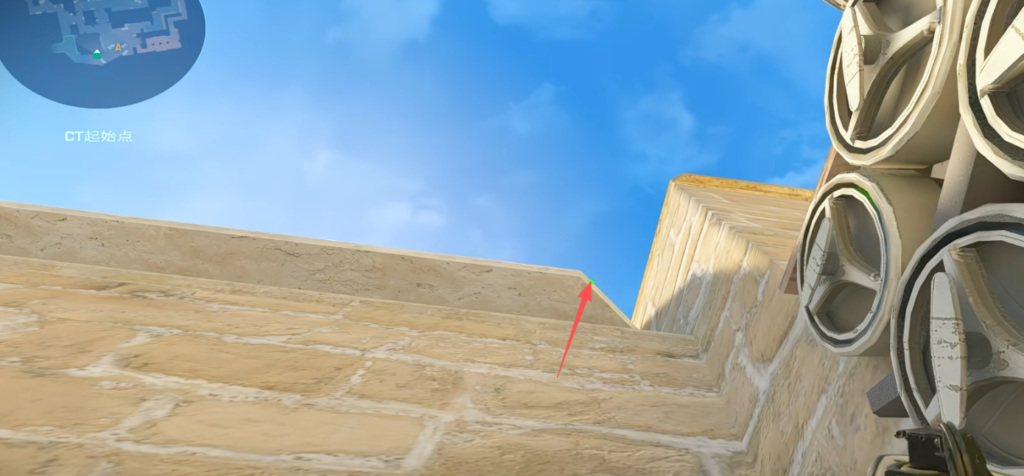
[CT Retake Flash from Dumpster ]
Mid Defense — VIP Utility
VIP Grenade
Hug the base of the VIP desk, aim at the square in the upper-right corner, right-click + duck jump-throw. Lands perfectly on mid.
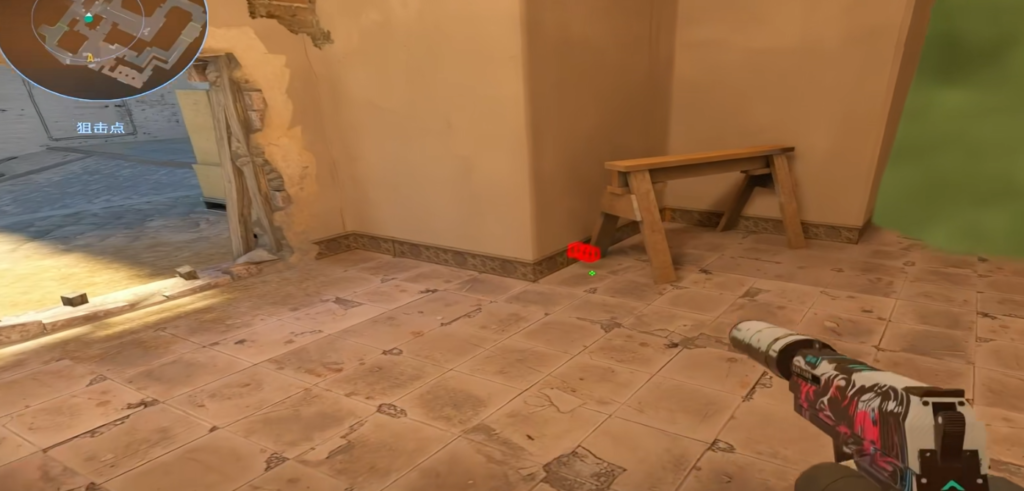
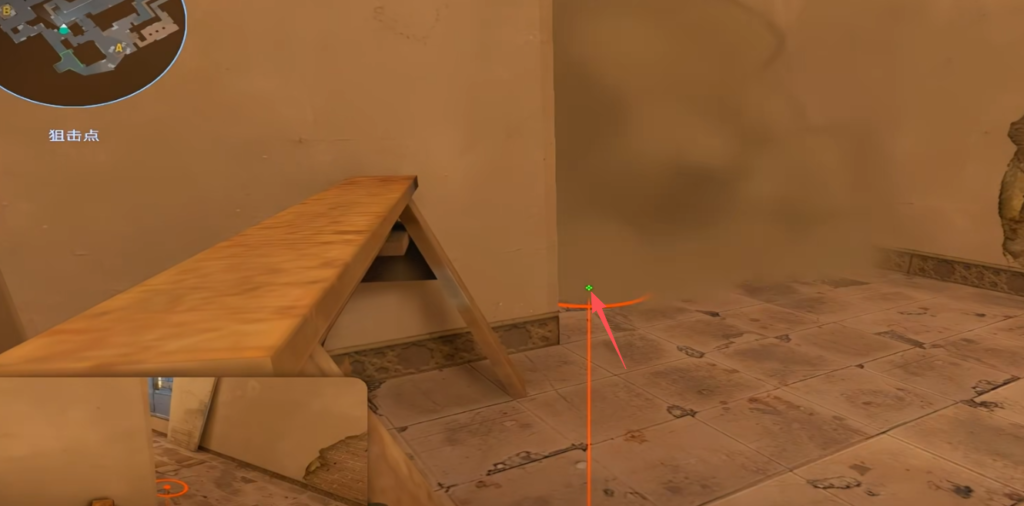
[ VIP Grenade Aim Point ]
VIP Flashes for Mid Info
Flash 1: Same lineup as the grenade — pops below, won’t affect you.
Flash 2: Aim at the dark spot on the wall, left-click throw. Look away slightly or you’ll flash yourself. Peek after the pop.
Underpass Fire & Grenade
Aim at the black line on the wall, throw fire slightly above it. The molotov and grenade from VIP down are mostly feel-based — run and throw.
B Site Defense
The Deep Window Molotov (Not the Shallow One)
A lot of players throw a molotov right at the window exit. Don’t do this. If Ts rush, they smoke it and it’s gone — leaving a gap they can peek through. Too early and it burns before they arrive.
The right way: Jump out of window, run to position, aim at the horizontal beam of the window, run one step and throw. Lands deep in B site.
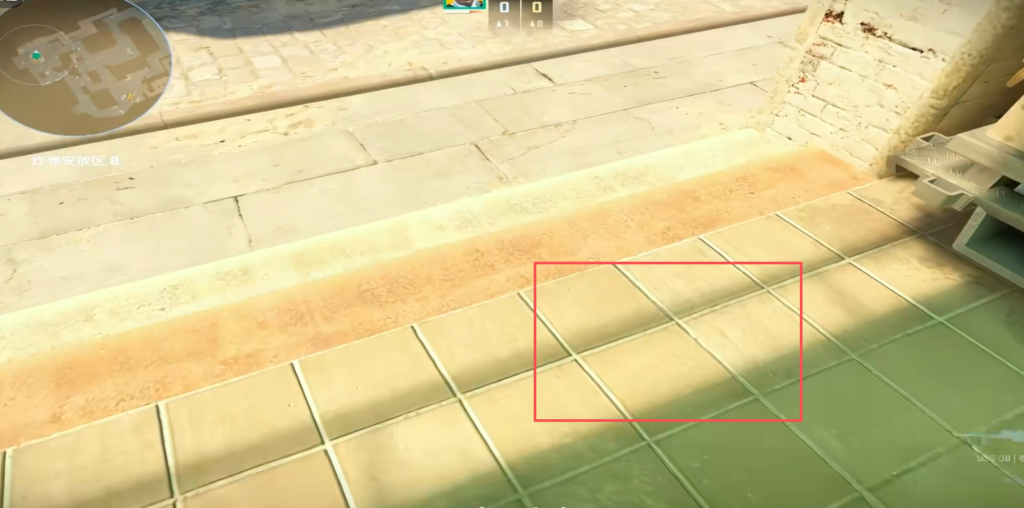
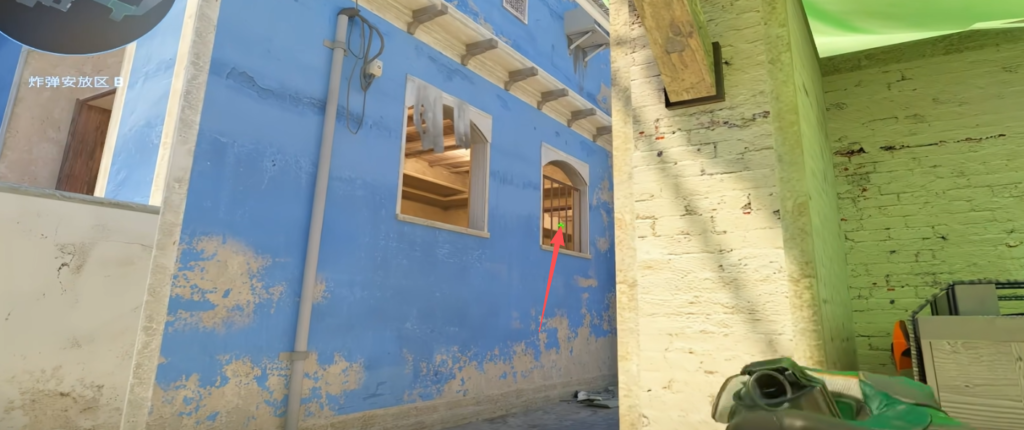
[Deep B Window Molotov]
Defense Strategy (No Inner Smoke)
I personally don’t like throwing an inner smoke. Instead: keep jump-peeking. If you spot a rush, right-click throw a “door-smoke” at the B entrance. Hug the wall near boxes, peek window for kills. Your B小 teammate cross-fires.
Key rule: In a rush situation, it’s often better to fight with your gun than throw bad utility and get killed mid-throw.
B小 Utility
Flash to peek B小 for info: Hug the wall, aim at the first wooden beam extending outward, double-click flash, look away, peek.
Anti-B小 smoke (if enemy smokes B小): Throw a smoke around the B小 box area. Two benefits: (1) watch underpass without damage, (2) jump up here and shoot people in the side/back — they won’t see you standing here.
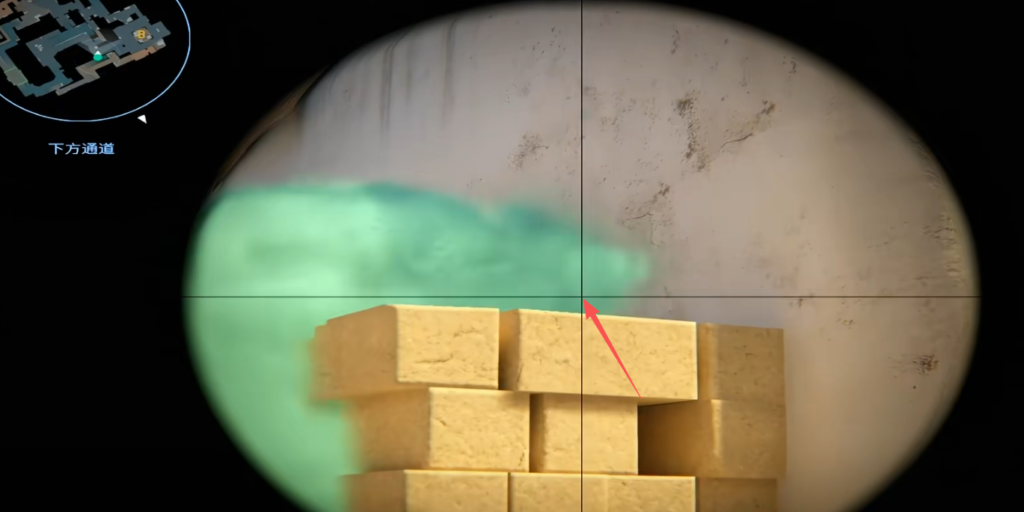
[Anti-B小 Smoke Position ]
B小 — Mid Retake Flash: Aim at the leaves/tree and throw toward mid. Whites out mid in a pinch.
T Side Attack
A Site Execute — Default Smokes & Flashes
Default CT Smoke
Hug the railing at T spawn, aim at the wooden beam extending right to the wall edge, left-click jump-throw. Lands tight against the big box — CTs on that box can’t see A1.
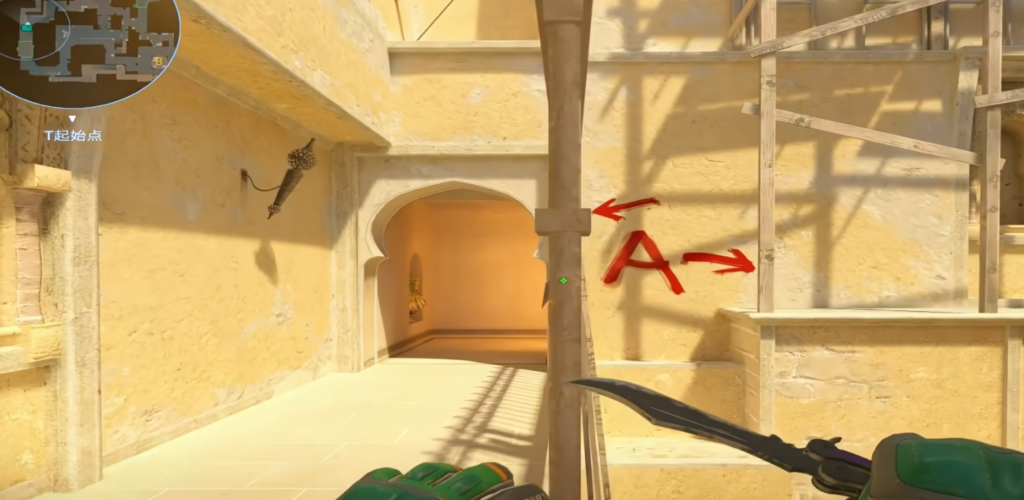
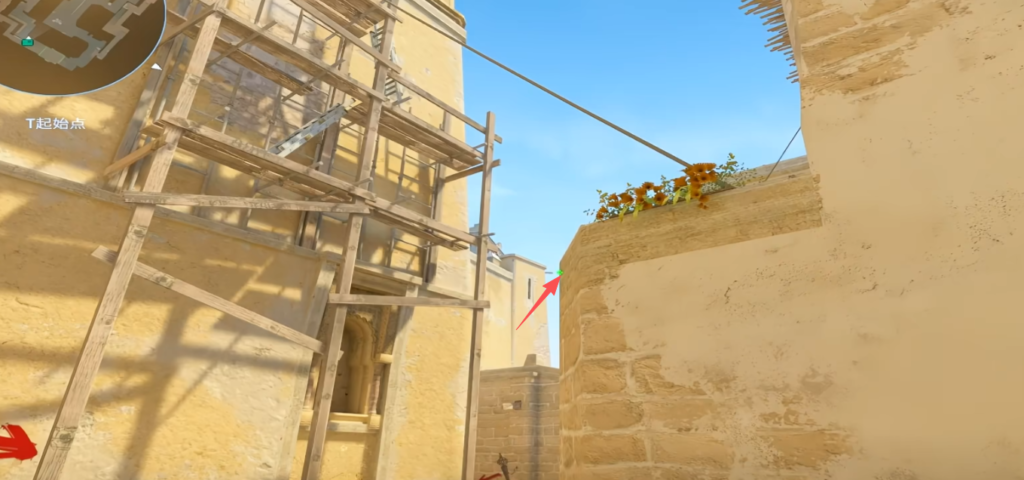
[CT Smoke from T Spawn (Railing) ]
Jump/Bench Smoke (Two Versions)
Version 1 (Fast pop, risky): Jump down from T spawn, aim at the wooden beam extending left toward the gap, jump-throw. Pops fast for quick executes but experienced CTs can sneak through the edge.
Version 2 (Slower, safer): Hug the right side of the door frame, aim at the diagonal edge (upper half), pull out slightly, jump-throw. Safer — no gap for CTs to sneak through.
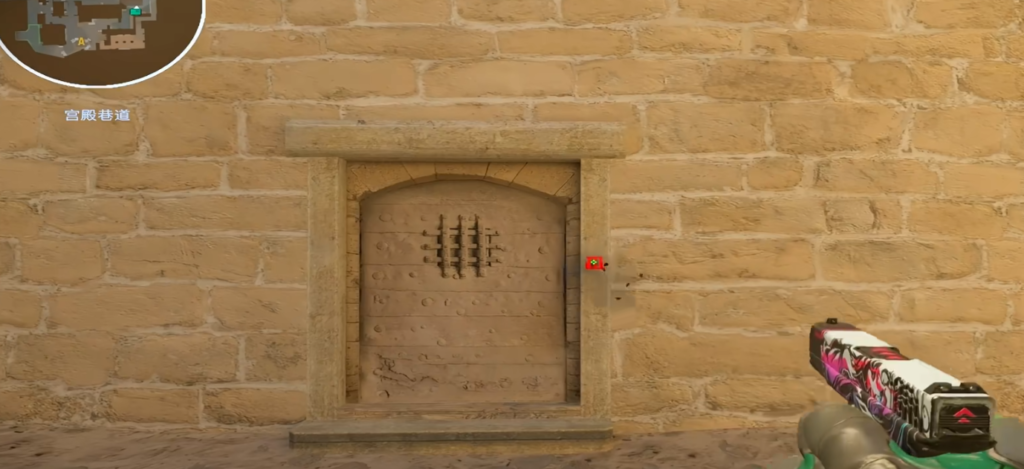
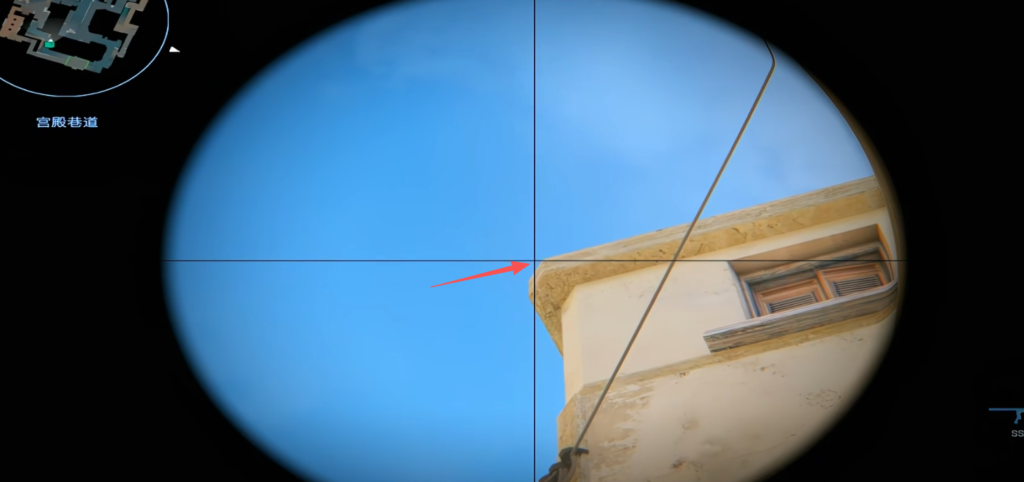
[Jump Smoke Version 2 — Door Frame Lineup ]
Connector Smoke (Overpass) & CT Smoke
Connector Smoke: From the same door frame position, aim at the black electrical lock on the pole, jump-throw.
CT Smoke (Back-of-Site): Same door frame position — aim and throw. Rounds out the A execute, covering CT spawn vision.
A1 Entry Flashes
Flash 1 (Lamp-post): Hug the center of the do … [OUTPUT TRUNCATED – 21507 chars omitted out of 71507 total] … 4w, https://crosshairforge.com/wp-content/uploads/2026/06/5ced3324-ea73-4bd4-af53-821714ed9726-300×152.png 300w, https://crosshairforge.com/wp-content/uploads/2026/06/5ced3324-ea73-4bd4-af53-821714ed9726-768×388.png 768w, https://crosshairforge.com/wp-content/uploads/2026/06/5ced3324-ea73-4bd4-af53-821714ed9726.png 1386w” sizes=”auto, (max-width: 1024px) 100vw, 1024px” />
[Silent A1 Flash from Ladder ]
Arch Smoke (from CT)
When pushing out of arch and the enemy has thrown a fire at your exit: Stand at the usual arch position, aim at the upper half of the wall, take one step forward and throw. This smoke blocks underpass exit and mid exit — only B小 remains as a threat angle.
Retake Flash from CT (Aggressive Repeek)
In a 2v2 situation where you’re holding A and spot enemies at A1/arch: Stand near the dumpster, aim at the diagonal line (upper half), left-click throw. Whites A1, arch, and anyone pushing toward site.
[CT Retake Flash from Dumpster ]
Mid Defense — VIP Utility
VIP Grenade
Hug the base of the VIP desk, aim at the square in the upper-right corner, right-click + duck jump-throw. Lands perfectly on mid.
[ VIP Grenade Aim Point ]
VIP Flashes for Mid Info
Flash 1: Same lineup as the grenade — pops below, won’t affect you.
Flash 2: Aim at the dark spot on the wall, left-click throw. Look away slightly or you’ll flash yourself. Peek after the pop.
Underpass Fire & Grenade
Aim at the black line on the wall, throw fire slightly above it. The molotov and grenade from VIP down are mostly feel-based — run and throw.
B Site Defense
The Deep Window Molotov (Not the Shallow One)
A lot of players throw a molotov right at the window exit. Don’t do this. If Ts rush, they smoke it and it’s gone — leaving a gap they can peek through. Too early and it burns before they arrive.
The right way: Jump out of window, run to position, aim at the horizontal beam of the window, run one step and throw. Lands deep in B site.
[Deep B Window Molotov]
Defense Strategy (No Inner Smoke)
I personally don’t like throwing an inner smoke. Instead: keep jump-peeking. If you spot a rush, right-click throw a “door-smoke” at the B entrance. Hug the wall near boxes, peek window for kills. Your B小 teammate cross-fires.
Key rule: In a rush situation, it’s often better to fight with your gun than throw bad utility and get killed mid-throw.
B小 Utility
Flash to peek B小 for info: Hug the wall, aim at the first wooden beam extending outward, double-click flash, look away, peek.
Anti-B小 smoke (if enemy smokes B小): Throw a smoke around the B小 box area. Two benefits: (1) watch underpass without damage, (2) jump up here and shoot people in the side/back — they won’t see you standing here.
[Anti-B小 Smoke Position ]
B小 — Mid Retake Flash: Aim at the leaves/tree and throw toward mid. Whites out mid in a pinch.
T Side Attack
A Site Execute — Default Smokes & Flashes
Default CT Smoke
Hug the railing at T spawn, aim at the wooden beam extending right to the wall edge, left-click jump-throw. Lands tight against the big box — CTs on that box can’t see A1.
[CT Smoke from T Spawn (Railing) ]
Jump/Bench Smoke (Two Versions)
Version 1 (Fast pop, risky): Jump down from T spawn, aim at the wooden beam extending left toward the gap, jump-throw. Pops fast for quick executes but experienced CTs can sneak through the edge.
Version 2 (Slower, safer): Hug the right side of the door frame, aim at the diagonal edge (upper half), pull out slightly, jump-throw. Safer — no gap for CTs to sneak through.
[Jump Smoke Version 2 — Door Frame Lineup ]
Connector Smoke (Overpass) & CT Smoke
Connector Smoke: From the same door frame position, aim at the black electrical lock on the pole, jump-throw.
CT Smoke (Back-of-Site): Same door frame position — aim and throw. Rounds out the A execute, covering CT spawn vision.
A1 Entry Flashes
Flash 1 (Lamp-post): Hug the center of the door, aim at the lamp post tip, left-click throw. Whites everyone watching A1.
Flash 2 (T-shape — jump/bench pressure): Step forward to the left door frame, aim at the T-shape on the wall, walk one step silently and jump-throw. This pressures jump/bench — they can’t watch A1. Best part: CTs peeking through the connector smoke can’t hold the angle either.
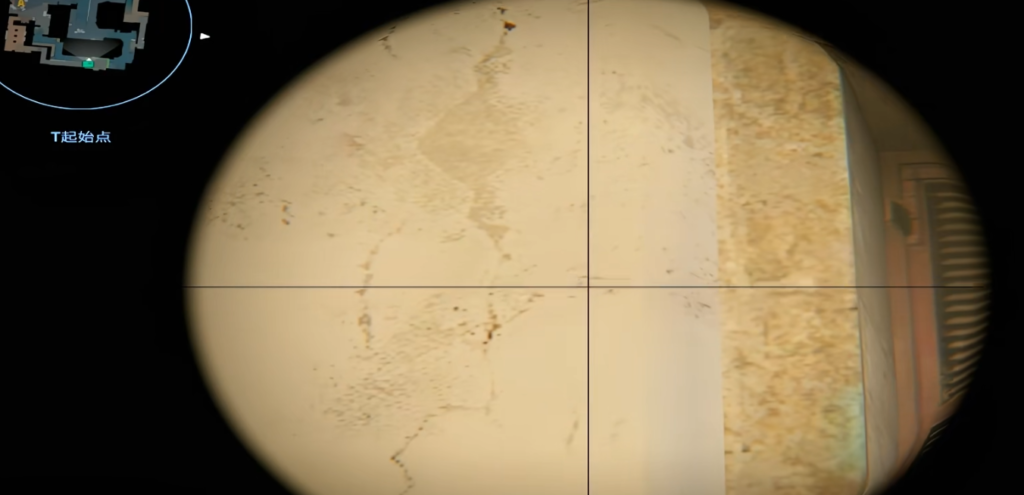
[A1 Flash 2 — T-Shape Aim Point ]
Mid Control — VIP Fast Smokes (All 5 Spawns)
This is the most crucial utility set for Mirage T side. Learn your spawn, hit the lineup, and your team controls mid. Spawns 1-5 can throw a fast VIP smoke. Position 6+ can’t — use the slow VIP smoke instead.
Spawn 1 — Closest to A1/A2: Aim at the white spot on the window (blackboard visible). W + jump-throw.
[ast VIP Smoke — Spawn 1 ]
Spawn 2 — Closest to mid: Aim at the white/red corner junction on the wall. W + jump-throw.
Spawn 3 — Aligned with the fence bar: Aim at the right side of the door frame (white frame to wall seam). W + jump-throw.
Spawn 4 — Facing the canvas: Aim at the triangle near the two red heart-like shapes. Upper-left of those. W + jump-throw.
Spawn 5 — Near the garbage bags: Aim at the white foam/object on the window-left hook’s tip. W + jump-throw.
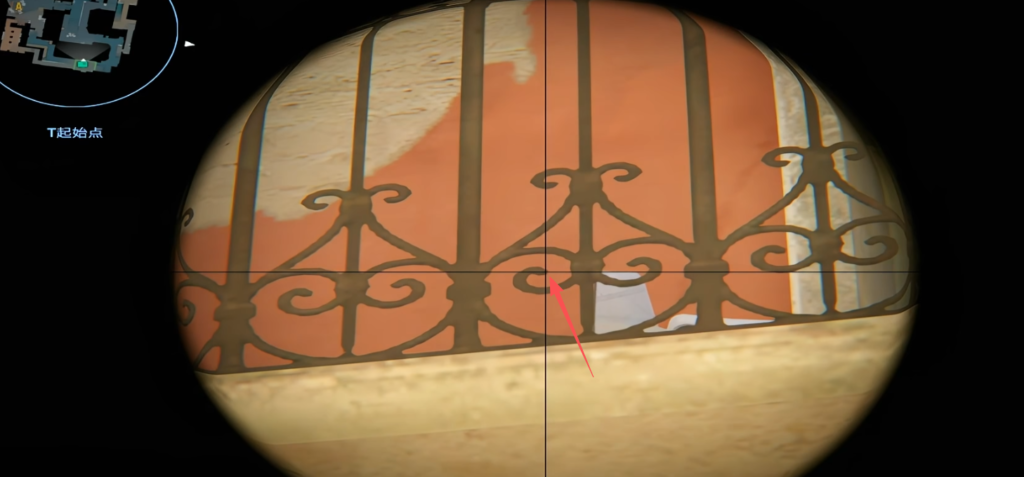
[ Fast VIP Smoke ]
Backup: Slow VIP Smoke (Any Spawn)
Hug the corner at T spawn. Aim at the first “seagull” symbol on the canvas, center of the second “seagull” symbol. Left-click jump-throw (no strafe needed). Same landing as the fast smoke.
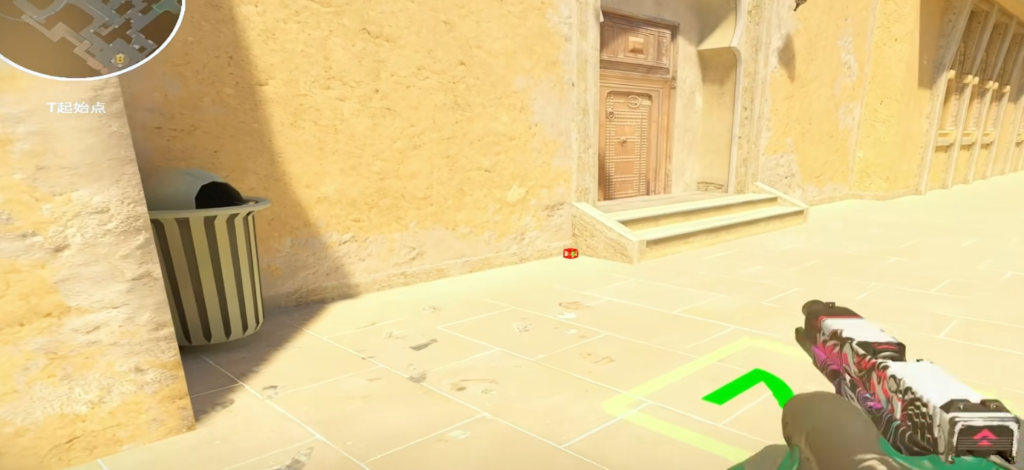
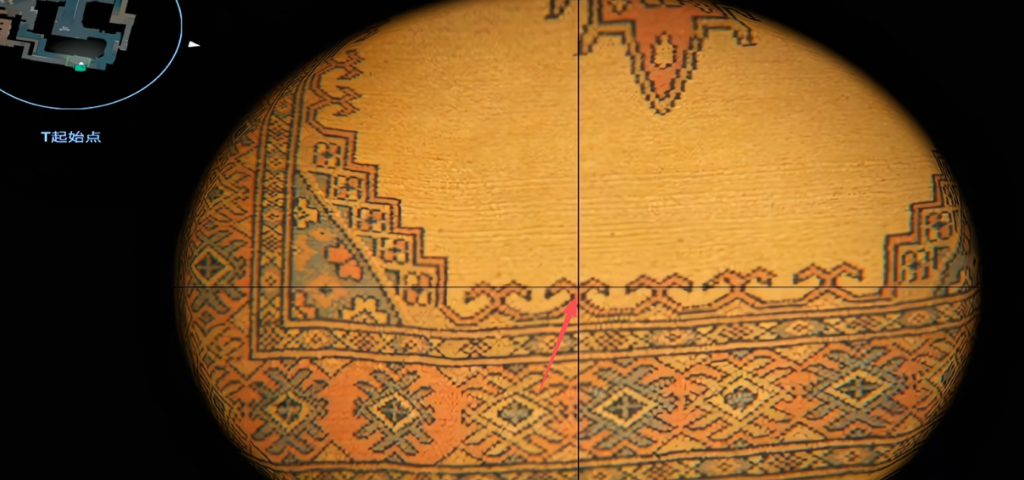
[Slow VIP Smoke — Canvas Seagull Symbols ]
Arch Smoke
Jump onto the dumpster, crouch, aim at the canvas (yellow bar near the bottom), extend slightly outward, crouch + W + jump-throw. Used by donk and ropz — 100% full-coverage.
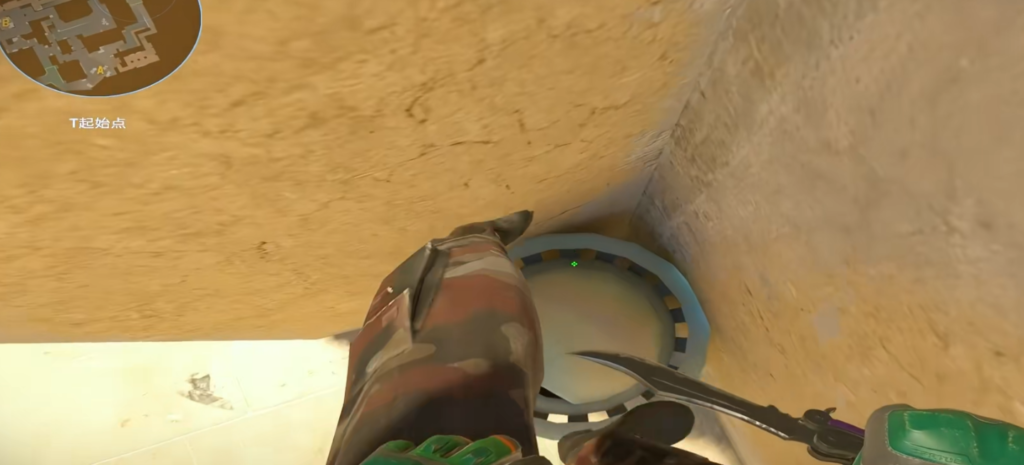
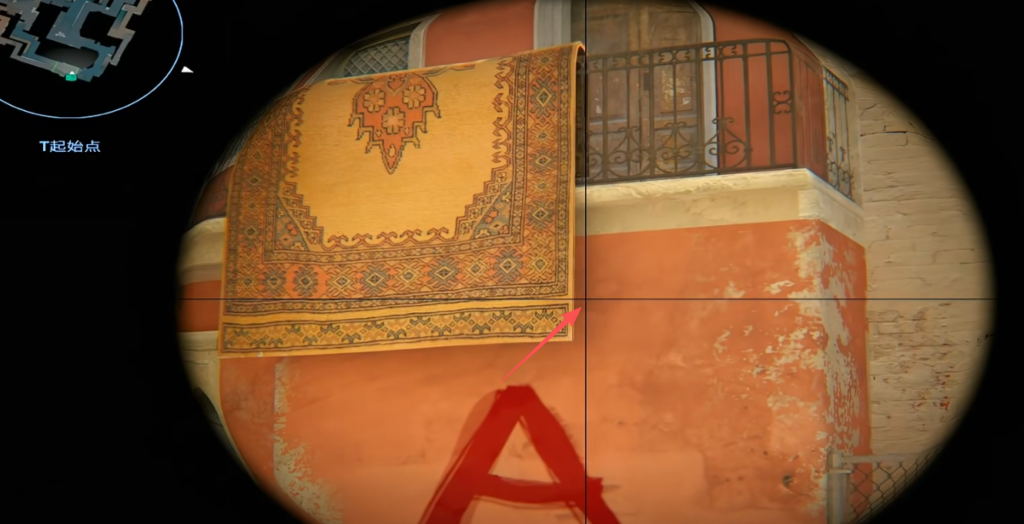
[Arch Smoke from Dumpster ]
Mid Utility (Flashes + Fire)
Flash 1: Step up on the ramp, aim first → second bottom of the lane toward mid. Whites mid.
Flash 2: Throw toward the left side of the sandbags. Whites mid CTs.
After both: Throw fire onto upper mid to prevent CT AWPs.
Second-Time VIP Smoke Refill & B小 Smoke
Refill: Hug the wheel groove, crouch, aim at the box corner, extend outward slightly, left-click throw.
B小 Smoke: From the gap between two cover spots, aim at the antenna tip, left-click throw.
B Site Execute
Standard B Site Smokes
Window Smoke: Near B entrance, aim at the second step’s corner above. Jump-throw. Lands inside the shop window.
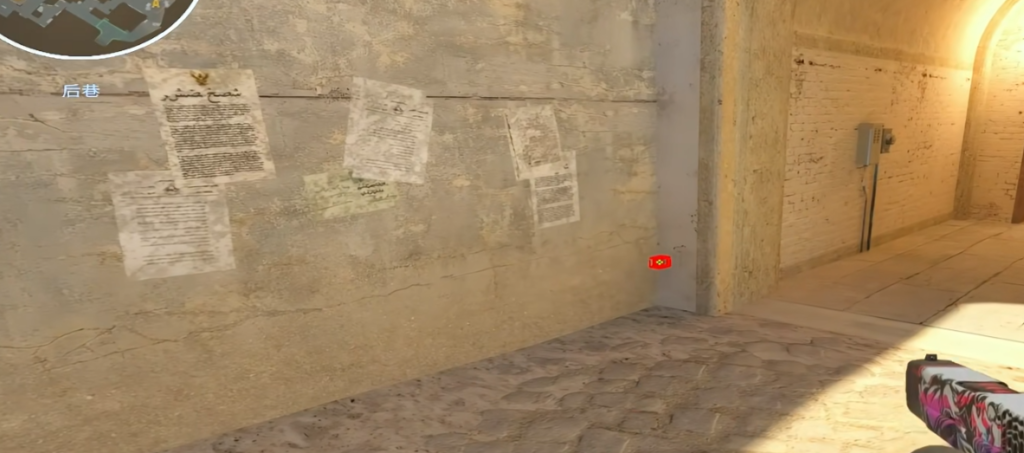
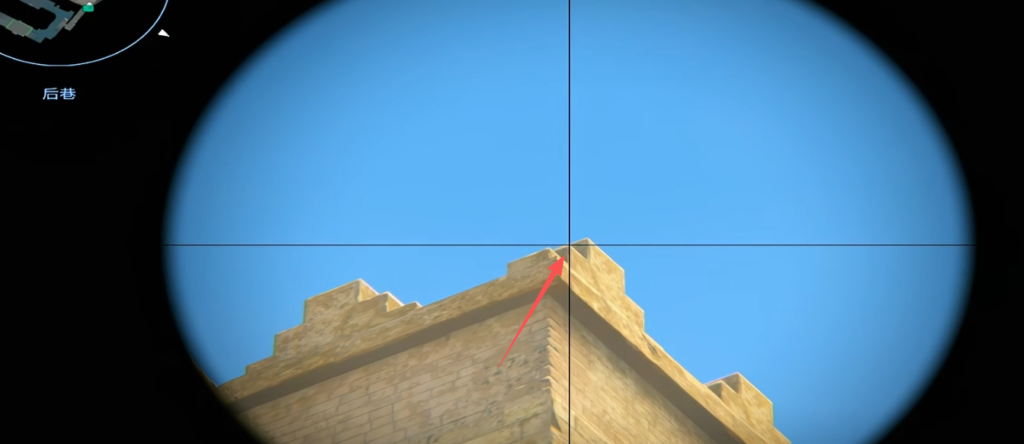
[B Window Smoke Aim Point ]
Door Smoke: Stand at the wall corner, aim at the wall-to-wall angle (seam line). Left-click jump-throw.
Bsamll Smoke: Same position, aim at the corner, extend slightly outward. Left-click (no jump).
B Site Flashes — Three-Flash Coverage System
Two flashes from the back: Aim at the black spot/crack on the wall. Jump-throw both in sequence. Whites all standard hold positions.
⚠️ The blanket position exception: A CT standing near the back boxes (the “blanket” spot) has no reaction to these two flashes. To counter: the first-entry player throws a third flash at the shadow/left side of the blanket position right before entry.
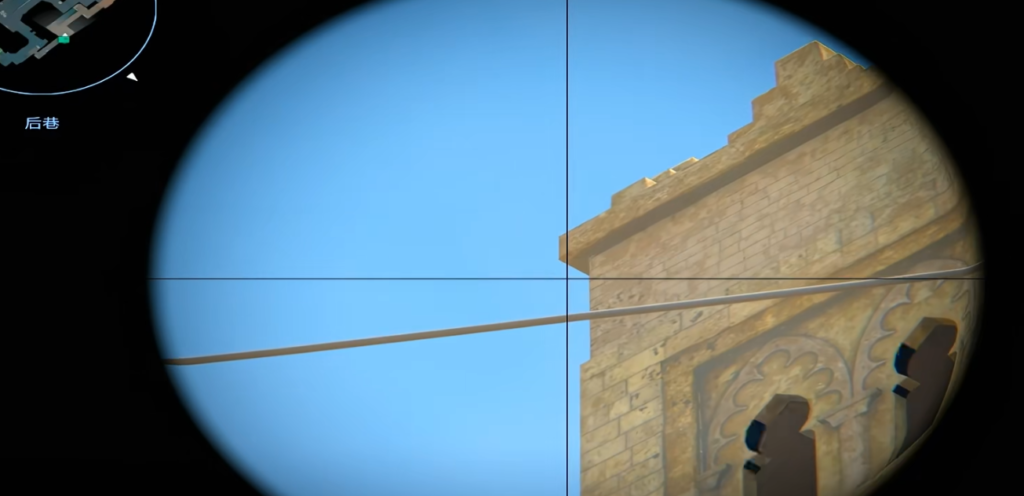
[B Site Blanket Position ]
Entry fire: Throw a molotov toward the lower spot — burns deep, nobody can stand there.
Training Routine
Here’s how I learned these lineups without spending hours in an empty server:
- Pick 3 lineups per position — one smoke, one flash, one molly. Master those before adding more.
- Practice 10 minutes before queuing — Load an offline server, throw each lineup 3 times in a row.
- Use the smoke crosshair setting — Maxing out all 5 smoke crosshair boxes in CS2 settings helps visualize landing points.
- Focus on the ones that win rounds — Mid smoke, Jungle smoke, and B bench smoke win more rounds than any flash lineup on their own.
After 3 days of this routine, I stopped thinking about lineups mid-round. They became automatic — and my win rate on Mirage T side went up noticeably.
Having trouble finding the right sensitivity? Check my 2-step sensitivity method.
Final Thought
Utility is the difference between a good Mirage player and a great one. You can have the best aim in the lobby, but if you’re smoking off your own team’s A take, it doesn’t matter.
The real secret? Don’t try to learn all 200 lineups at once. Master 2-3 per position, practice them until they’re automatic, and add more over time. Progress beats perfection every time.
Related: Crosshair Generator · Pro Database · Complete Settings Guide
Last updated: June 2026 — CrosshairForge.com